
Learning how to make a bow on nails is a fun way to add a delicate detail to an otherwise simple manicure. A tiny bow can completely change the look of your nails, whether you prefer soft pink polish, classic French tips, glitter accents, or a more detailed 3D design. The best part is that bow nail art doesn’t have to be complicated. With a fine nail-art brush, dotting tool, toothpick, or small striping brush, you can create different bow shapes at home.
These bow nail ideas range from beginner-friendly painted bows to more detailed designs that are ideal for special occasions. You can place a single bow on one accent nail or repeat the motif across your manicure. Choose the technique that matches your skill level, then experiment with colors, finishes, and nail shapes to create a bow manicure that feels like your own.
Tiny Center Bow

A tiny center bow is one of the easiest places to start. Paint your base color and let it dry completely. Then use a fine brush to create two small loops meeting in the middle, followed by two short ribbon tails. Keeping the bow small makes it easier to control the shape.
Soft pink, nude, cream, or sheer white bases work especially well because they allow the bow to become the focal point. For a simple everyday manicure, use white or red polish for the bow.
Red Bow on Sheer Nude Nails
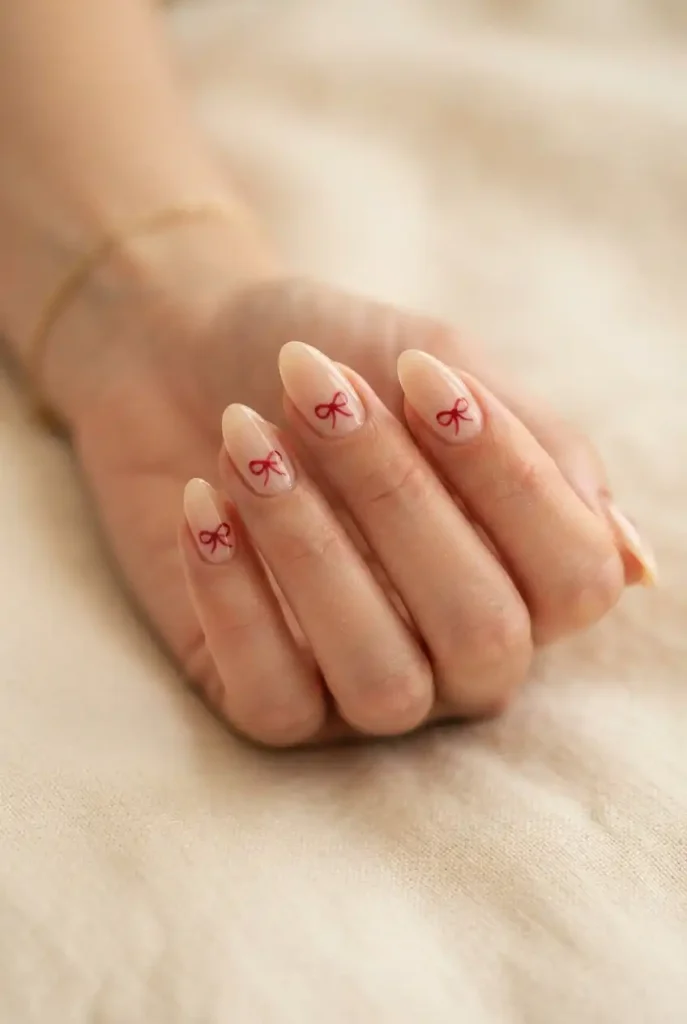
A red bow against a sheer nude base creates a classic contrast without requiring a complicated design. Keep the base translucent or use a very light nude polish. Once dry, paint small red loops near the center or lower portion of each nail.
Use a deep cherry red for a sophisticated appearance or a brighter red for a playful finish. A glossy top coat helps the colors look crisp and polished.
Bow French Tips

Combine two classic nail-art elements by adding tiny bows to a French manicure. Start with a sheer pink or nude base and create traditional white French tips. Add a miniature bow at the center of selected tips rather than covering the entire nail.
This design works particularly well when the bows are kept proportional to the nail. For a more playful variation, replace the white French tip with a pastel shade and use white bows.
Double Bow Accent Nail
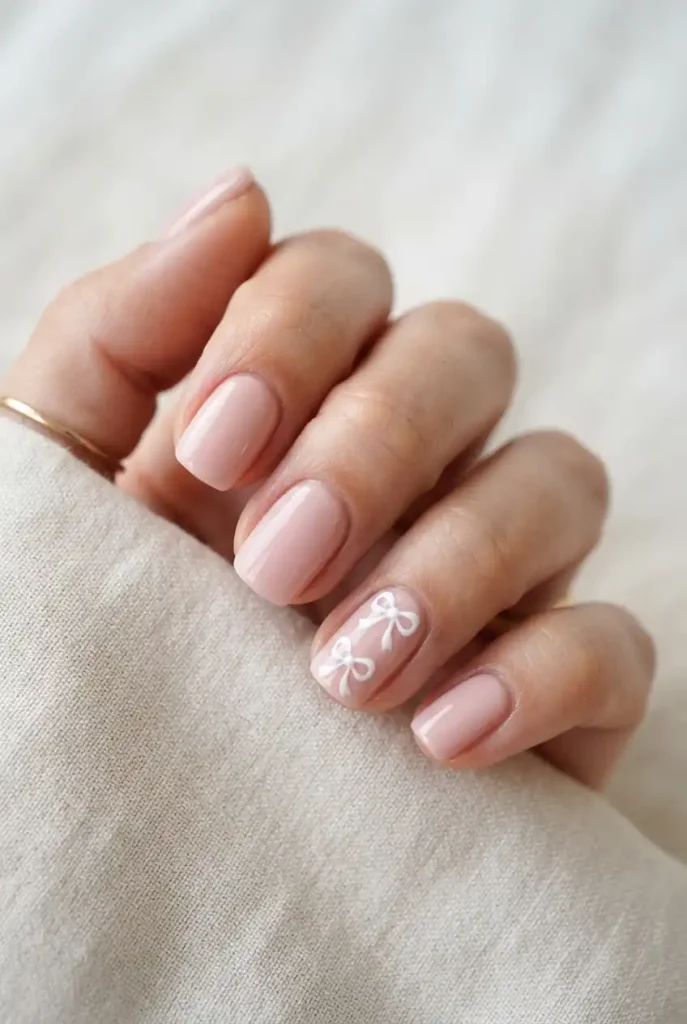
Instead of putting a bow on every nail, dedicate one accent nail to two small bows. Paint the remaining nails in a coordinated solid color, then create two miniature bows vertically on the accent nail.
This works beautifully with contrasting combinations such as pink and white, navy and cream, or burgundy and blush. Leave enough space between the bows so that each shape remains clearly visible.
Black Bow on Milky White Nails
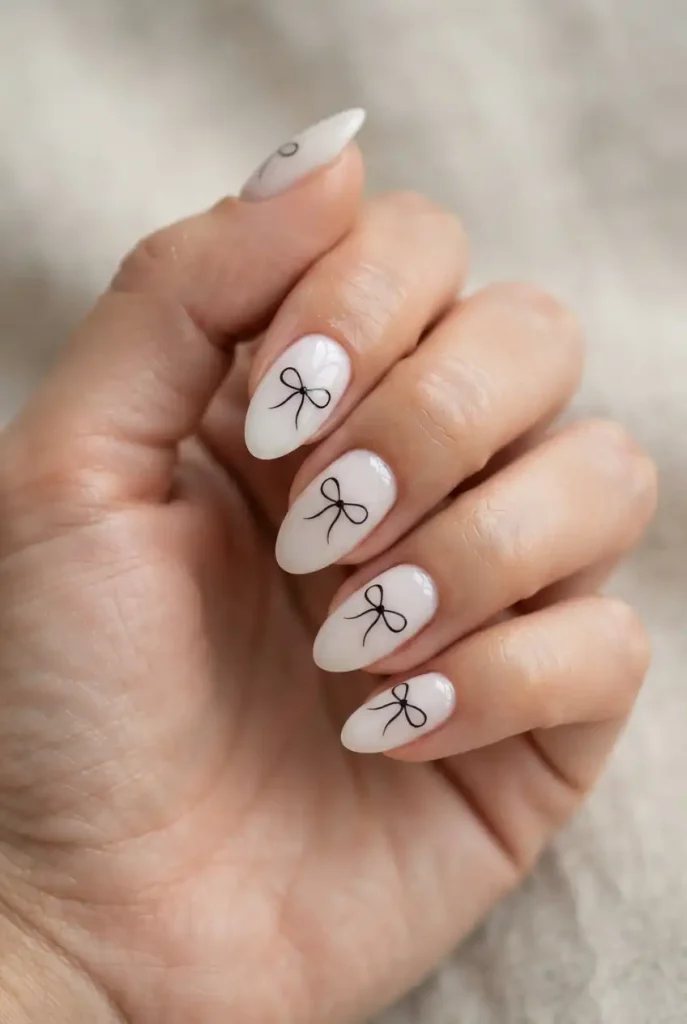
For a more graphic look, pair milky white nails with thin black bows. The strong color contrast makes the bow shape easy to see, even when the design is very small.
Use a fine striping brush to outline the loops and ribbon tails. You can leave the bows as outlines for a delicate appearance or fill them with black polish for a bolder effect.
Pink Bow With Pearl Center
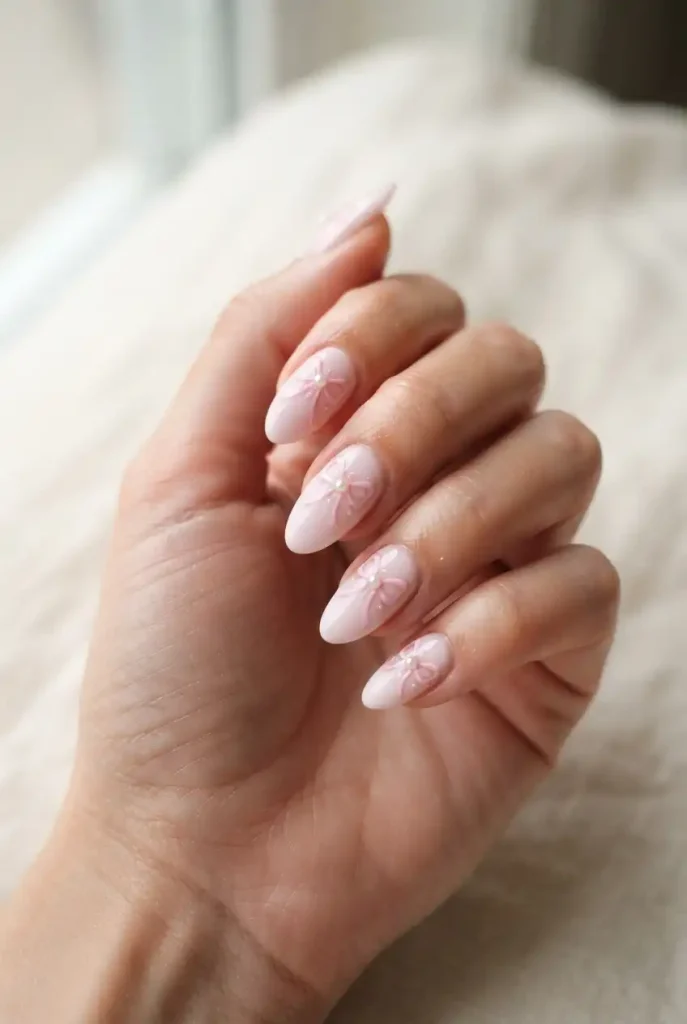
A tiny pearl detail can make a painted bow look more dimensional. Paint a pink bow on a neutral or pale pink base and place a small pearl embellishment at the center where the loops meet.
Use nail-safe adhesive intended for embellishments and seal the surrounding design carefully. This idea is particularly pretty for bridal-inspired manicures, parties, or romantic occasions.
Glitter Bow Details

Glitter can highlight a bow without making the entire manicure heavily decorated. Paint the base in a neutral, pink, or soft lavender shade, then create bows using glitter polish or add a small amount of fine glitter over painted bows.
Fine glitter is usually easier to control than large particles when working on small nail-art details. Finish with a suitable top coat to smooth the surface.
Bow Outline Nail Art
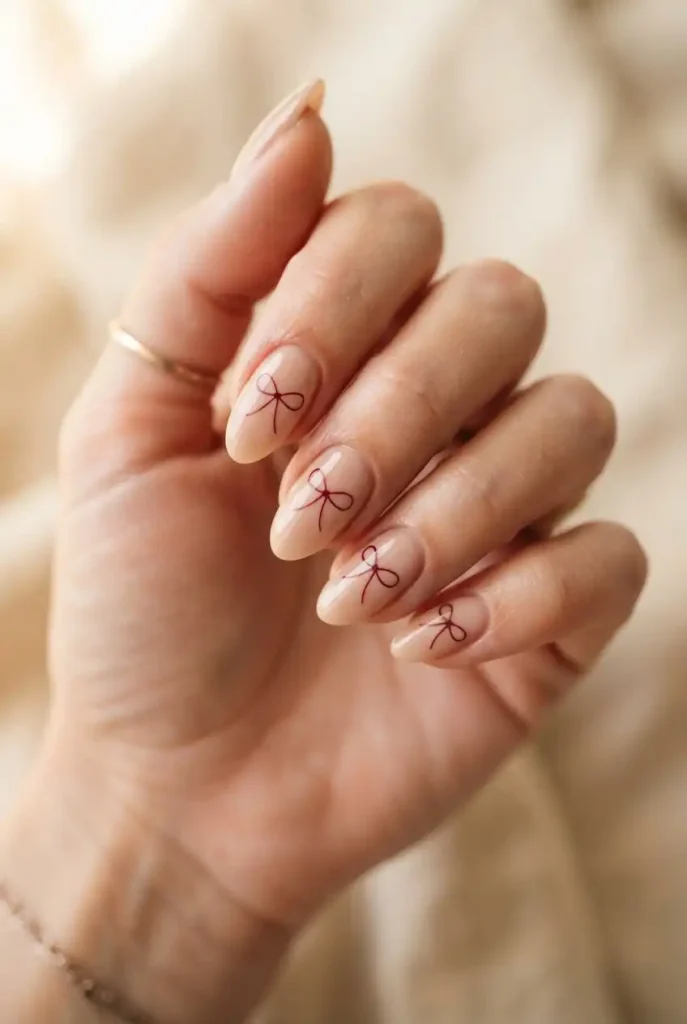
You don’t have to fill a bow completely. An outline design uses thin lines to suggest the loops and tails, creating a lighter and more minimalist manicure.
Choose a contrasting shade that can be seen clearly against your base. White on pink, black on nude, or burgundy on pale beige are simple combinations to try.
Bow on a Classic Red Manicure
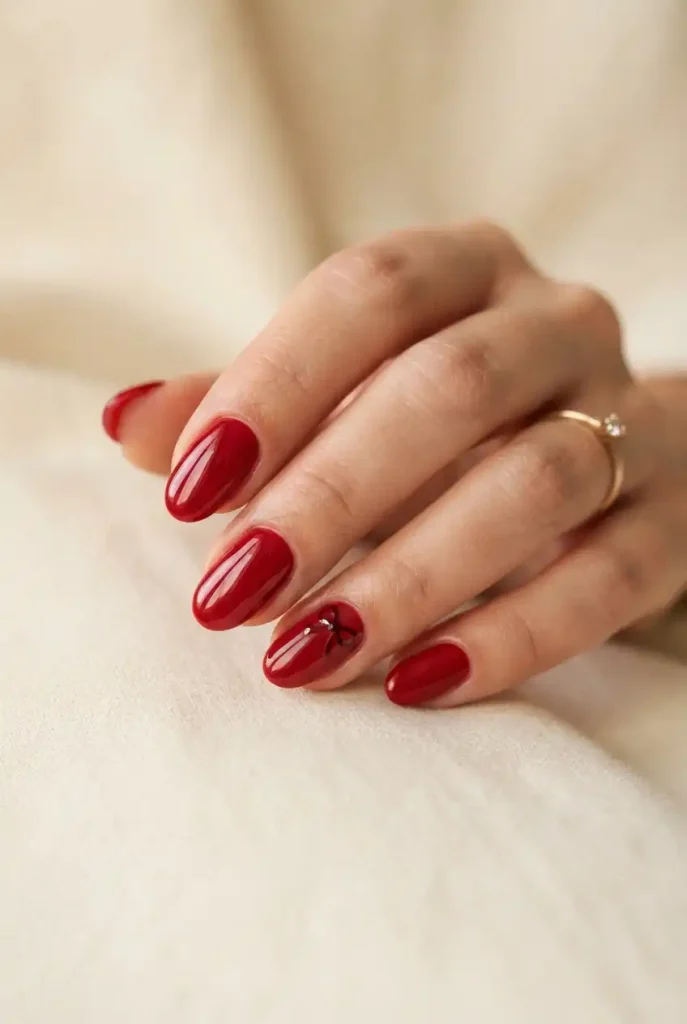
A red-on-red design can create subtle depth while maintaining a classic appearance. Choose a red base and add bows in a slightly lighter or darker red. Alternatively, use a red bow over a neutral accent nail while keeping the rest of the manicure solid red.
The tone-on-tone approach is especially useful if you want the bow motif to remain understated.
Pastel Bow Nails
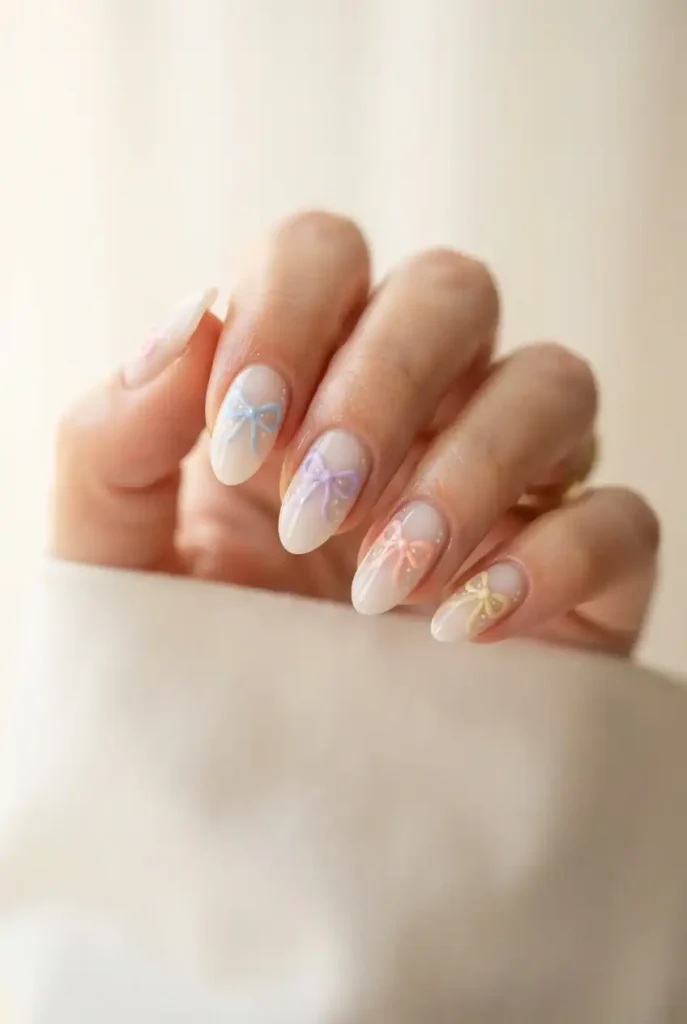
Pastel colors make bow nail art feel soft and playful. Try a different pastel bow on each nail using shades such as baby blue, lavender, peach, butter yellow, and soft pink.
Keep the base sheer or milky white so the different colors don’t compete. This is also a good approach if you want a colorful manicure without using dark or highly saturated polish.
French Bow Accent
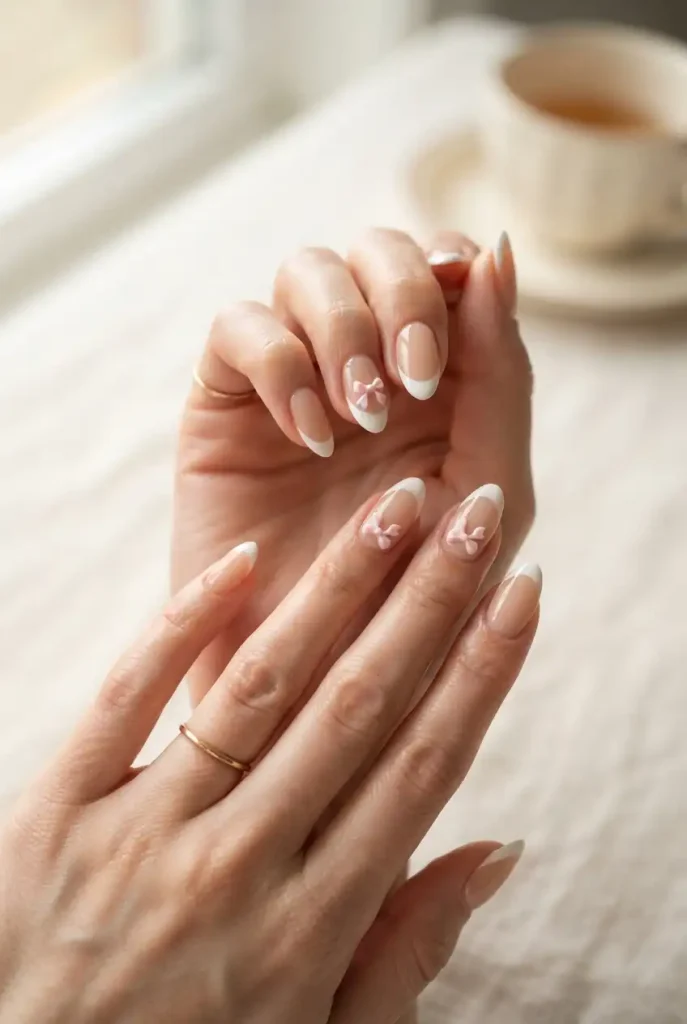
Instead of placing a bow directly on the nail, use it as a small accent beside a French tip. Create a classic French manicure first, then paint a tiny bow near one side of selected nails.
Asymmetrical placement gives the design a more contemporary feel. Keep the bow slightly away from the cuticle and sidewall so the manicure doesn’t look crowded.
Metallic Gold Bow

A metallic gold bow creates a dressier finish with very little additional decoration. Use a nude, cream, or pale blush base and paint small gold bows on one or two accent nails.
Metallic polish can be harder to control when used for fine lines, so a fine nail-art brush and a steady hand are helpful. For a softer effect, choose champagne gold instead of a highly reflective yellow gold.
Red Velvet Bow Look
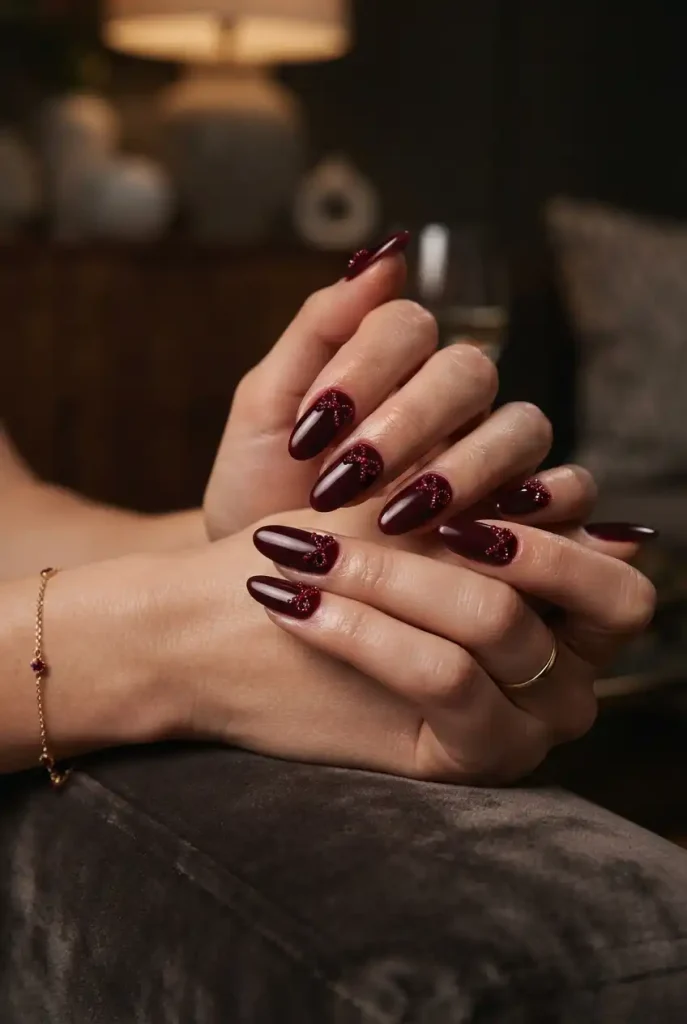
For a richer manicure, create a deep burgundy or wine-colored base and add slightly brighter red bows. The darker background gives the design a velvet-inspired appearance without requiring actual velvet material.
This combination works especially well for fall and winter manicures. Keep the bow shape simple so the deep colors remain the focus.
3D Bow Charm Nails
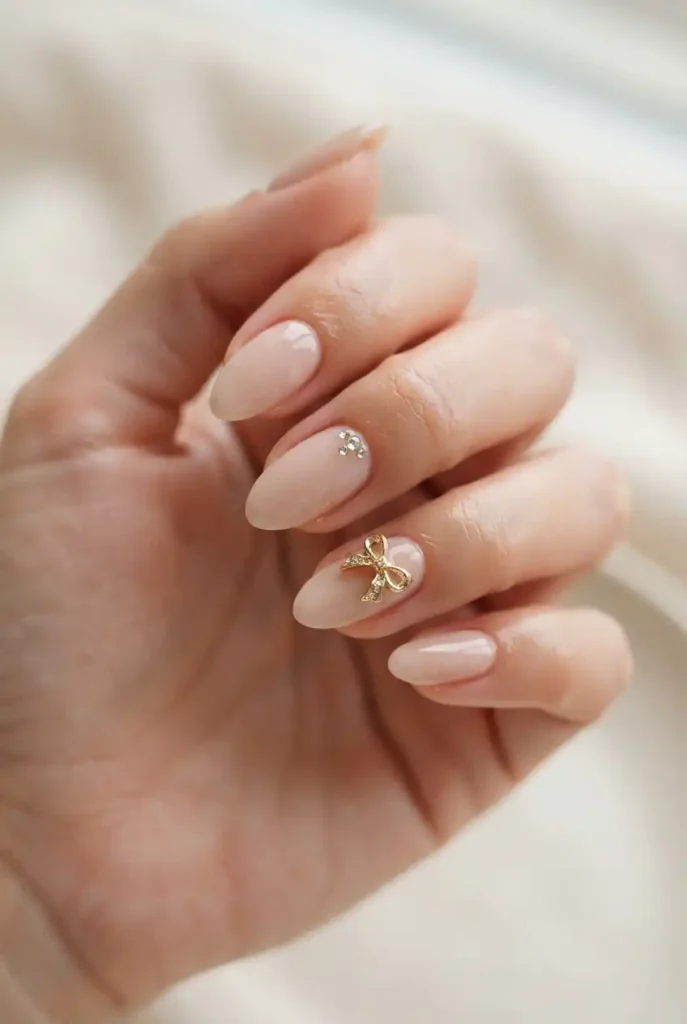
If you want the bow to stand out physically, use a small nail-safe 3D bow charm. Apply the charm to one or two nails rather than every nail to keep the manicure balanced.
A neutral base is a useful choice because it lets the raised decoration become the focal point. Make sure any embellishment is securely attached and doesn’t interfere with everyday activities.
Tiny Bow at the Cuticle
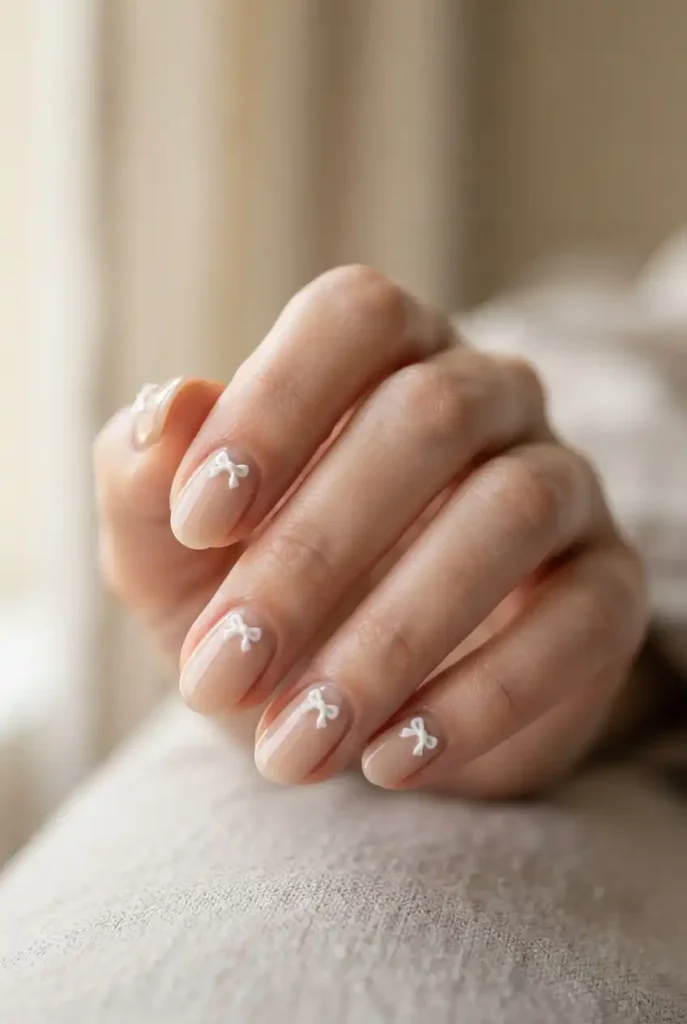
Move the bow away from the center and place it close to the cuticle area. This creates a delicate detail while leaving most of the nail surface clean.
A sheer pink, beige, or milky base works well here. Use a very small brush and avoid placing polish directly onto the cuticle or surrounding skin.
White Bow on Baby Pink Nails
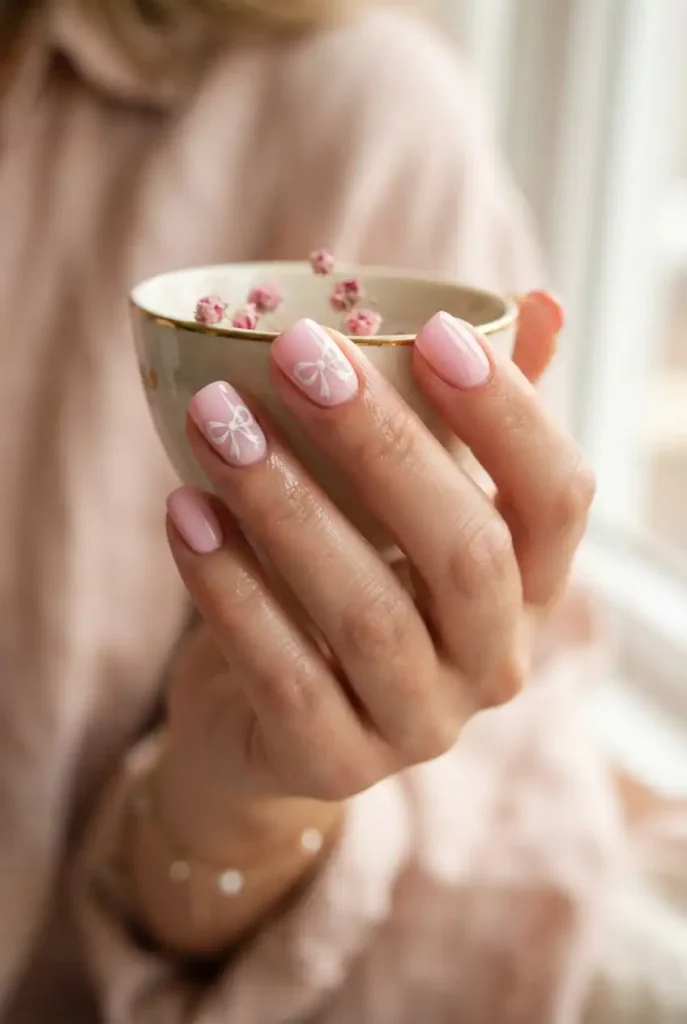
Baby pink and white make a naturally soft combination. Paint every nail a translucent or opaque baby pink, then add small white bows to selected nails.
For a coordinated manicure, keep the bow size consistent. You can also place a single white bow on the ring finger and leave the other nails plain for an understated result.
Bow With Ribbon Tails

Give the bow a more recognizable ribbon shape by extending the two tails below the loops. Cut the tails into simple angled points rather than leaving them as straight lines.
This small detail adds movement to the design. It looks particularly attractive on medium or long nails where there is enough surface area for the loops and tails to remain distinct.
Bow and Tiny Heart Combination

Pair a small bow with an equally small heart for a playful manicure. Place the bow on one side of the nail and the heart nearby, leaving plenty of negative space.
Keep both shapes simple rather than adding many decorative elements. A pink-and-red palette works well for romantic occasions, while pastel shades can make the design suitable for everyday wear.
Bow Accent With Rhinestone Center
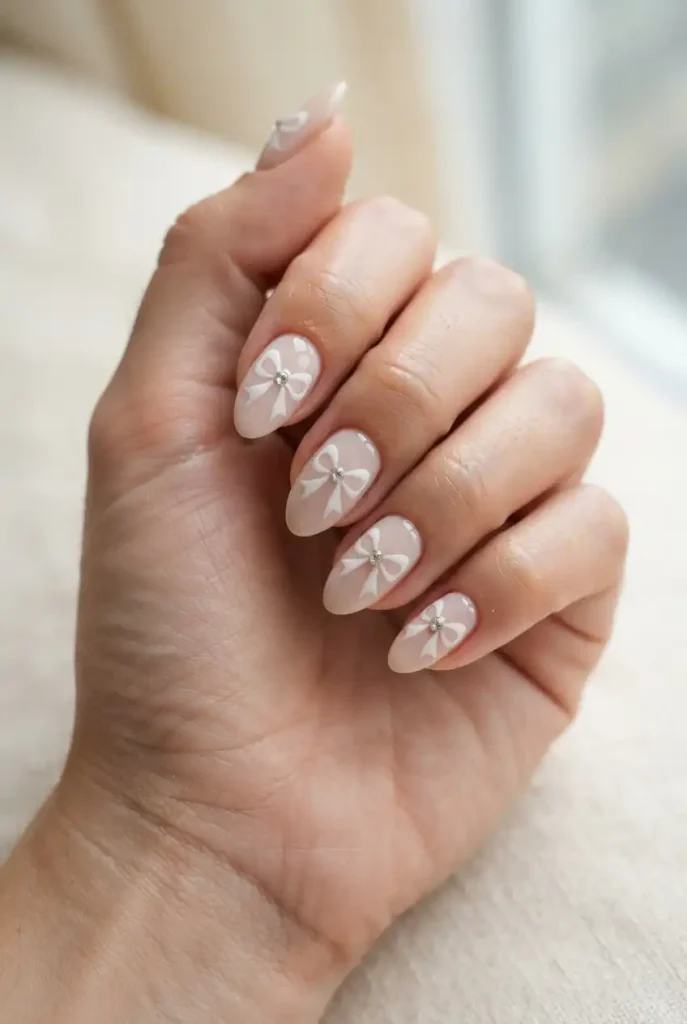
For a more decorative variation, add a single small rhinestone to the middle of a painted bow. The stone should be small enough that the bow remains recognizable.
This technique works best when used sparingly. One or two embellished nails can provide enough sparkle without overwhelming the rest of the manicure.
Minimalist Single Bow
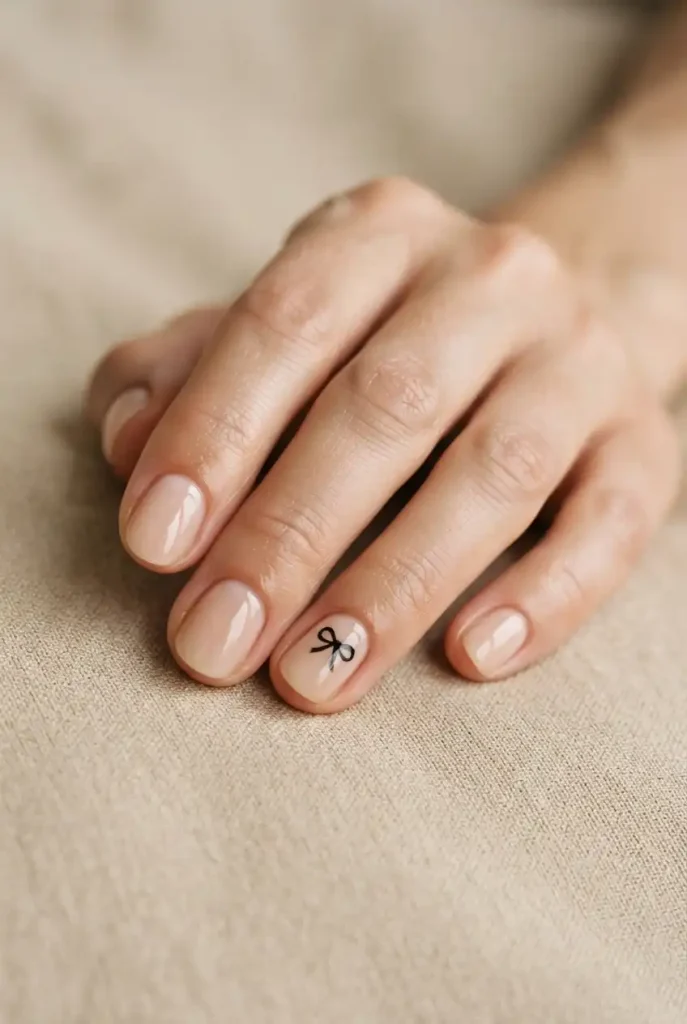
Sometimes one bow is enough. Paint most of the nails in a simple nude, cream, or sheer pink shade and place one carefully painted bow on a single accent nail.
This is one of the easiest versions for beginners because you only need to create one detailed design. It also works well if you prefer minimalist manicures that don’t feel overly decorated.
Layered Bow With a Glossy Finish

For a slightly more detailed bow, build the design by layering colors. Paint the main bow in a soft pink, then add a tiny darker center and fine accent lines to suggest folds in the ribbon.
Finish the entire manicure with a glossy top coat once the artwork has dried sufficiently. The layered color creates depth while keeping the design small and wearable.
Simple Tips for Making Bow Nail Art at Home
A few small preparation steps can make bow nail art much easier to control.
Start with a smooth base. Apply your base color evenly and allow it to dry before attempting detailed artwork. Uneven polish can make tiny lines difficult to control.
Use a fine brush. A small nail-art detail brush is useful for creating the loops and ribbon tails. A dotting tool can also help form the initial shapes.
Practice the bow on paper first. If you’re new to nail art, draw several tiny bows on paper to understand how much polish your brush holds and how small you want the loops.
Work in thin layers. Too much polish can cause small bow details to spread or lose their shape.
Keep the design proportional. A bow that is too large can dominate a short nail, while an extremely tiny bow may disappear on a longer nail. Adjust the scale according to your nail length and shape.
Let details dry before top coating. Brushing over wet artwork can smear fine lines and distort the loops.
How to Make a Simple Bow on Nails Step by Step
For beginners, the basic painted bow can be broken down into a few manageable movements.
- Apply your chosen base coat and color.
- Allow the base to dry thoroughly.
- Use a fine nail-art brush to make one small loop.
- Create a matching loop on the opposite side.
- Add a tiny center where the two loops meet.
- Paint two short ribbon tails beneath the center.
- Allow the design to dry.
- Finish with a suitable top coat.
Don’t worry if your first bows aren’t perfectly symmetrical. Small differences can be disguised by adjusting the center knot or adding a tiny decorative detail.
How to Make Bow Nails Look More Professional
The cleanest bow designs usually depend more on control and spacing than on complicated techniques. Choose a simple color palette and avoid trying to fit too many decorations onto one nail.
If you’re a beginner, start with one accent nail. Once you’re comfortable creating consistent loops, move on to multiple bows. A fine brush, good lighting, steady hand position, and enough drying time can make detailed nail art much easier.
You can also use nail stickers, decals, or small embellishments when freehand painting isn’t your preferred method. The goal is to create a manicure that suits your skill level rather than forcing a complicated technique.
Choosing the Best Bow Nail Design
The right bow design depends on the overall look you want. For an everyday manicure, a minimalist single bow, outline bow, or tiny center bow keeps things subtle. French tips and pastel bows are useful when you want something more playful.
For weddings, parties, or special occasions, pearl centers, metallic bows, rhinestones, and three-dimensional charms can provide additional detail. Darker combinations such as burgundy and ruby red work particularly well when you want a richer seasonal manicure.
Most importantly, don’t feel limited to traditional pink and white. Bows can be adapted to almost any color palette, nail length, and shape.
Final Thoughts
A bow is a small design, but it offers plenty of room for creativity. Once you know how to make a bow on nails, you can change the size, placement, colors, finish, and decorations to create completely different manicures. Start with a simple painted bow if you’re new to nail art, then experiment with French tips, pearls, glitter, metallic details, or raised charms as your confidence grows.
Whether you prefer a barely-there accent or a manicure filled with playful ribbon details, the key is keeping each bow clean, proportional, and intentional. Choose one of these ideas as your starting point and adapt the colors and placement to create a bow manicure that feels personal to your style.